

Lighting Breakdown: Moody Day INT
I decided it’d be fun to write up a quick lighting breakdown for a recent short film I was on. We had numerous (but very common) lighting challenges on this project and I thought I’d share my approach to solving a few of those issues. I’ve included specific examples and diagrams at the bottom of this post.
The shoot location was a very small two-story apartment. We were shooting during daylight hours for very long periods of time, where lighting continuity and consistency was going to be problematic. Also because of the fast nature of the shoot, we wanted to keep the number of lighting instruments on set down to a minimum.
We roughly blocked out the scene beforehand but decided to leave the particulars until after we got the lights roughed in.

The main living room from the scout day. Notice the first and second florr set of windows with separate sets of window blinds. Apologies for the poor quality photo.
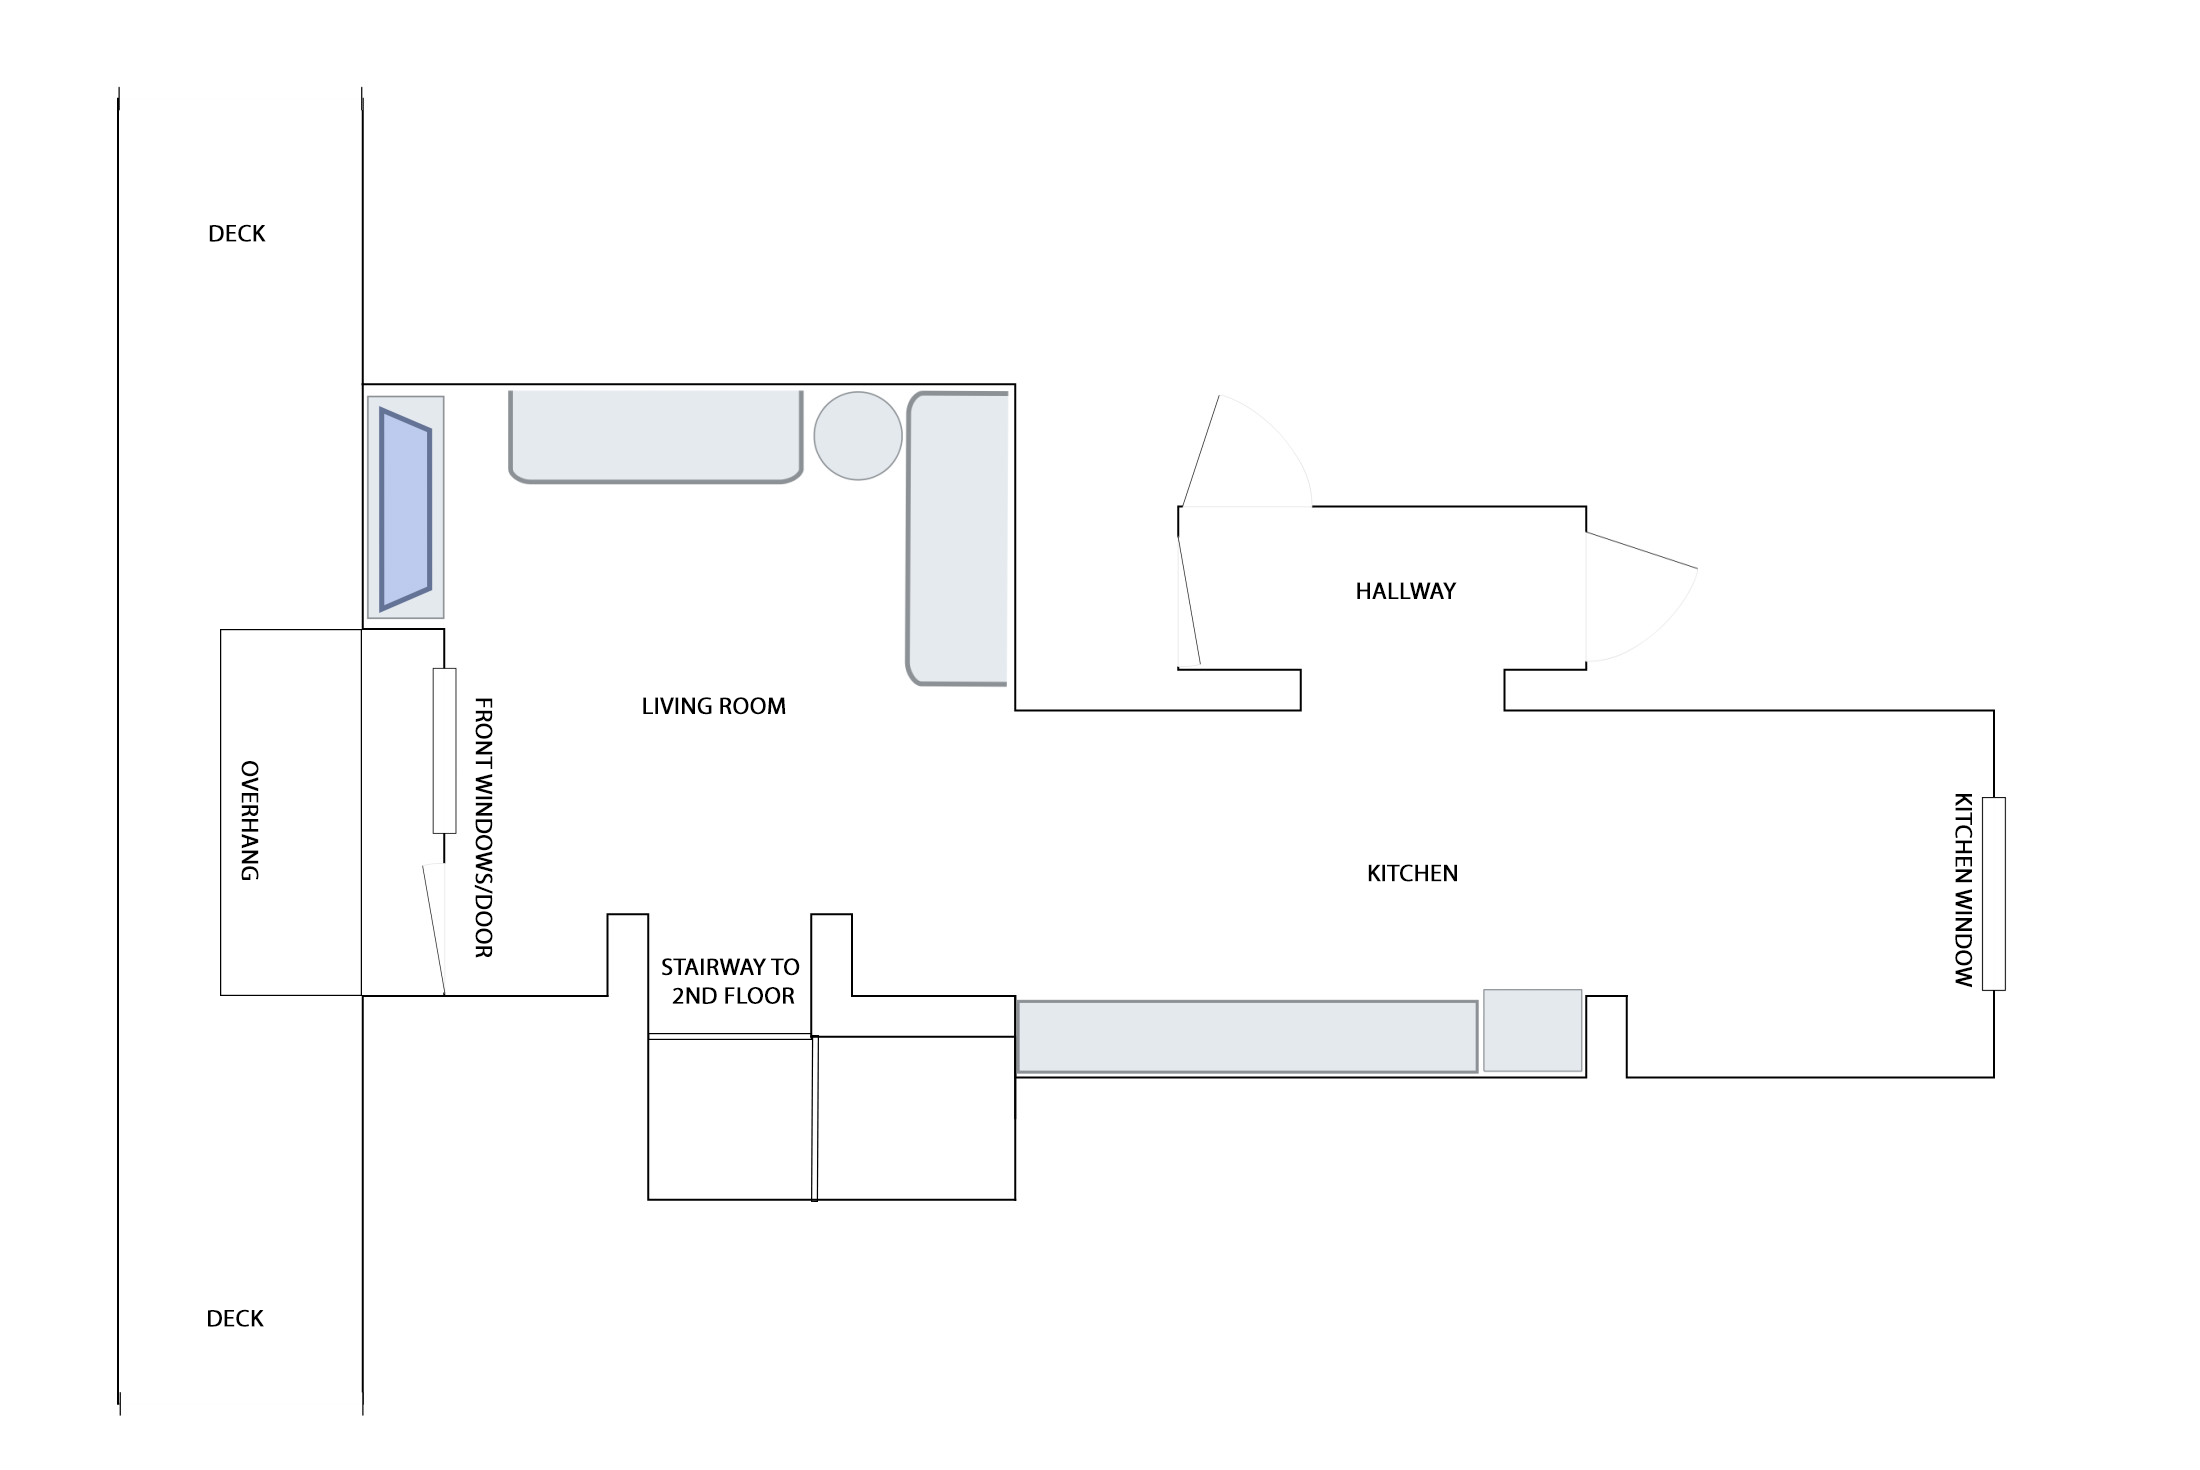
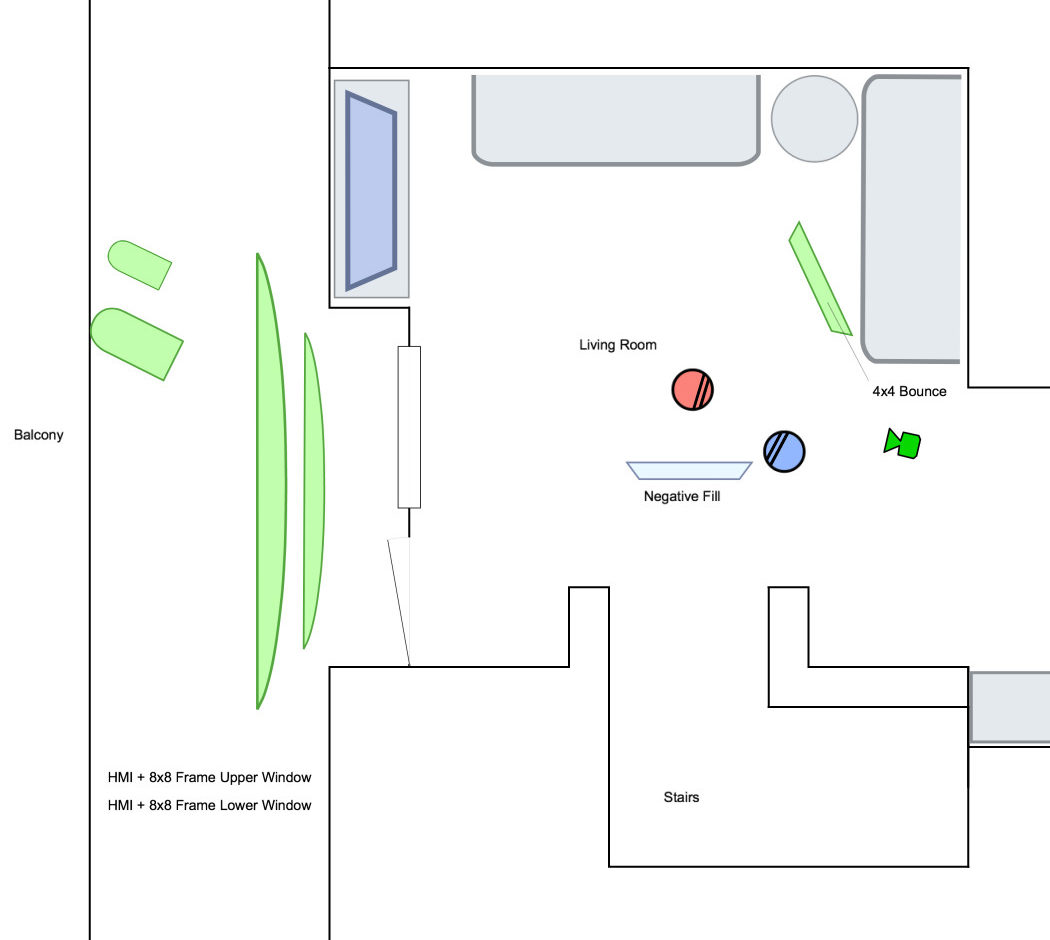
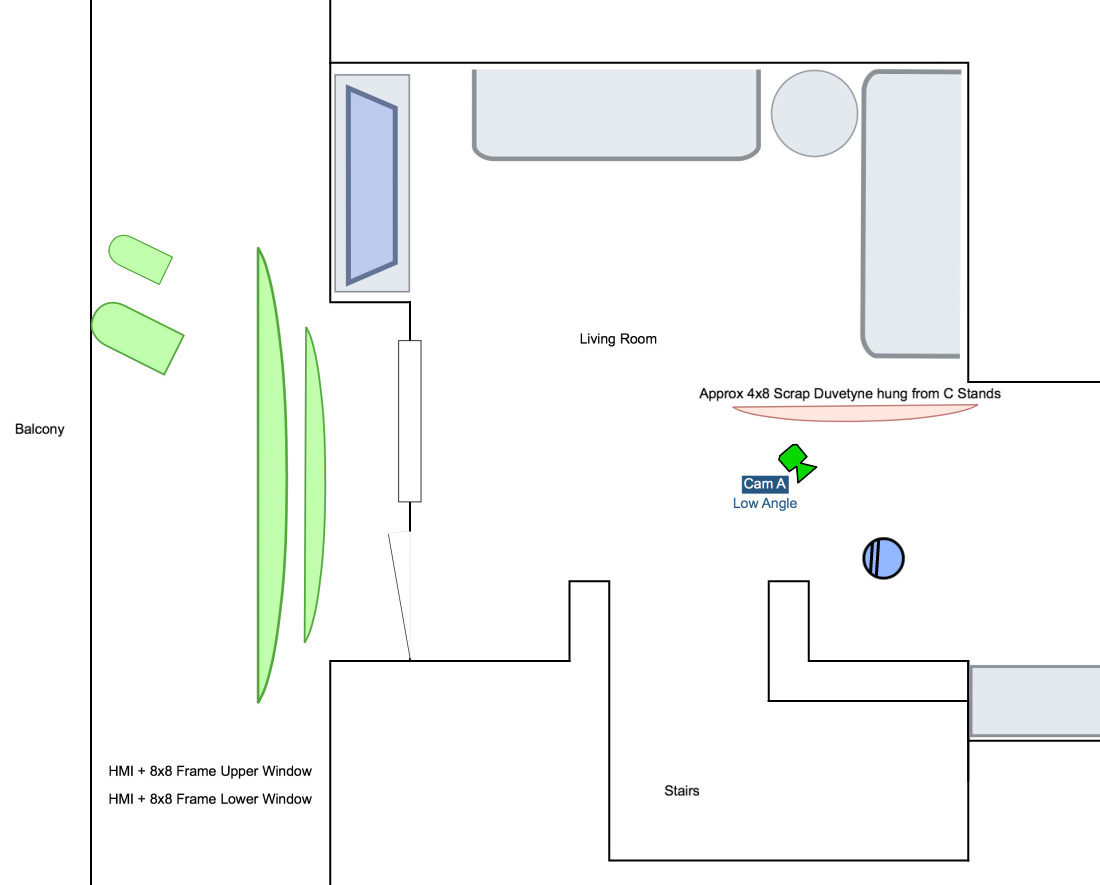
Overhead diagram of the apartment first floor.
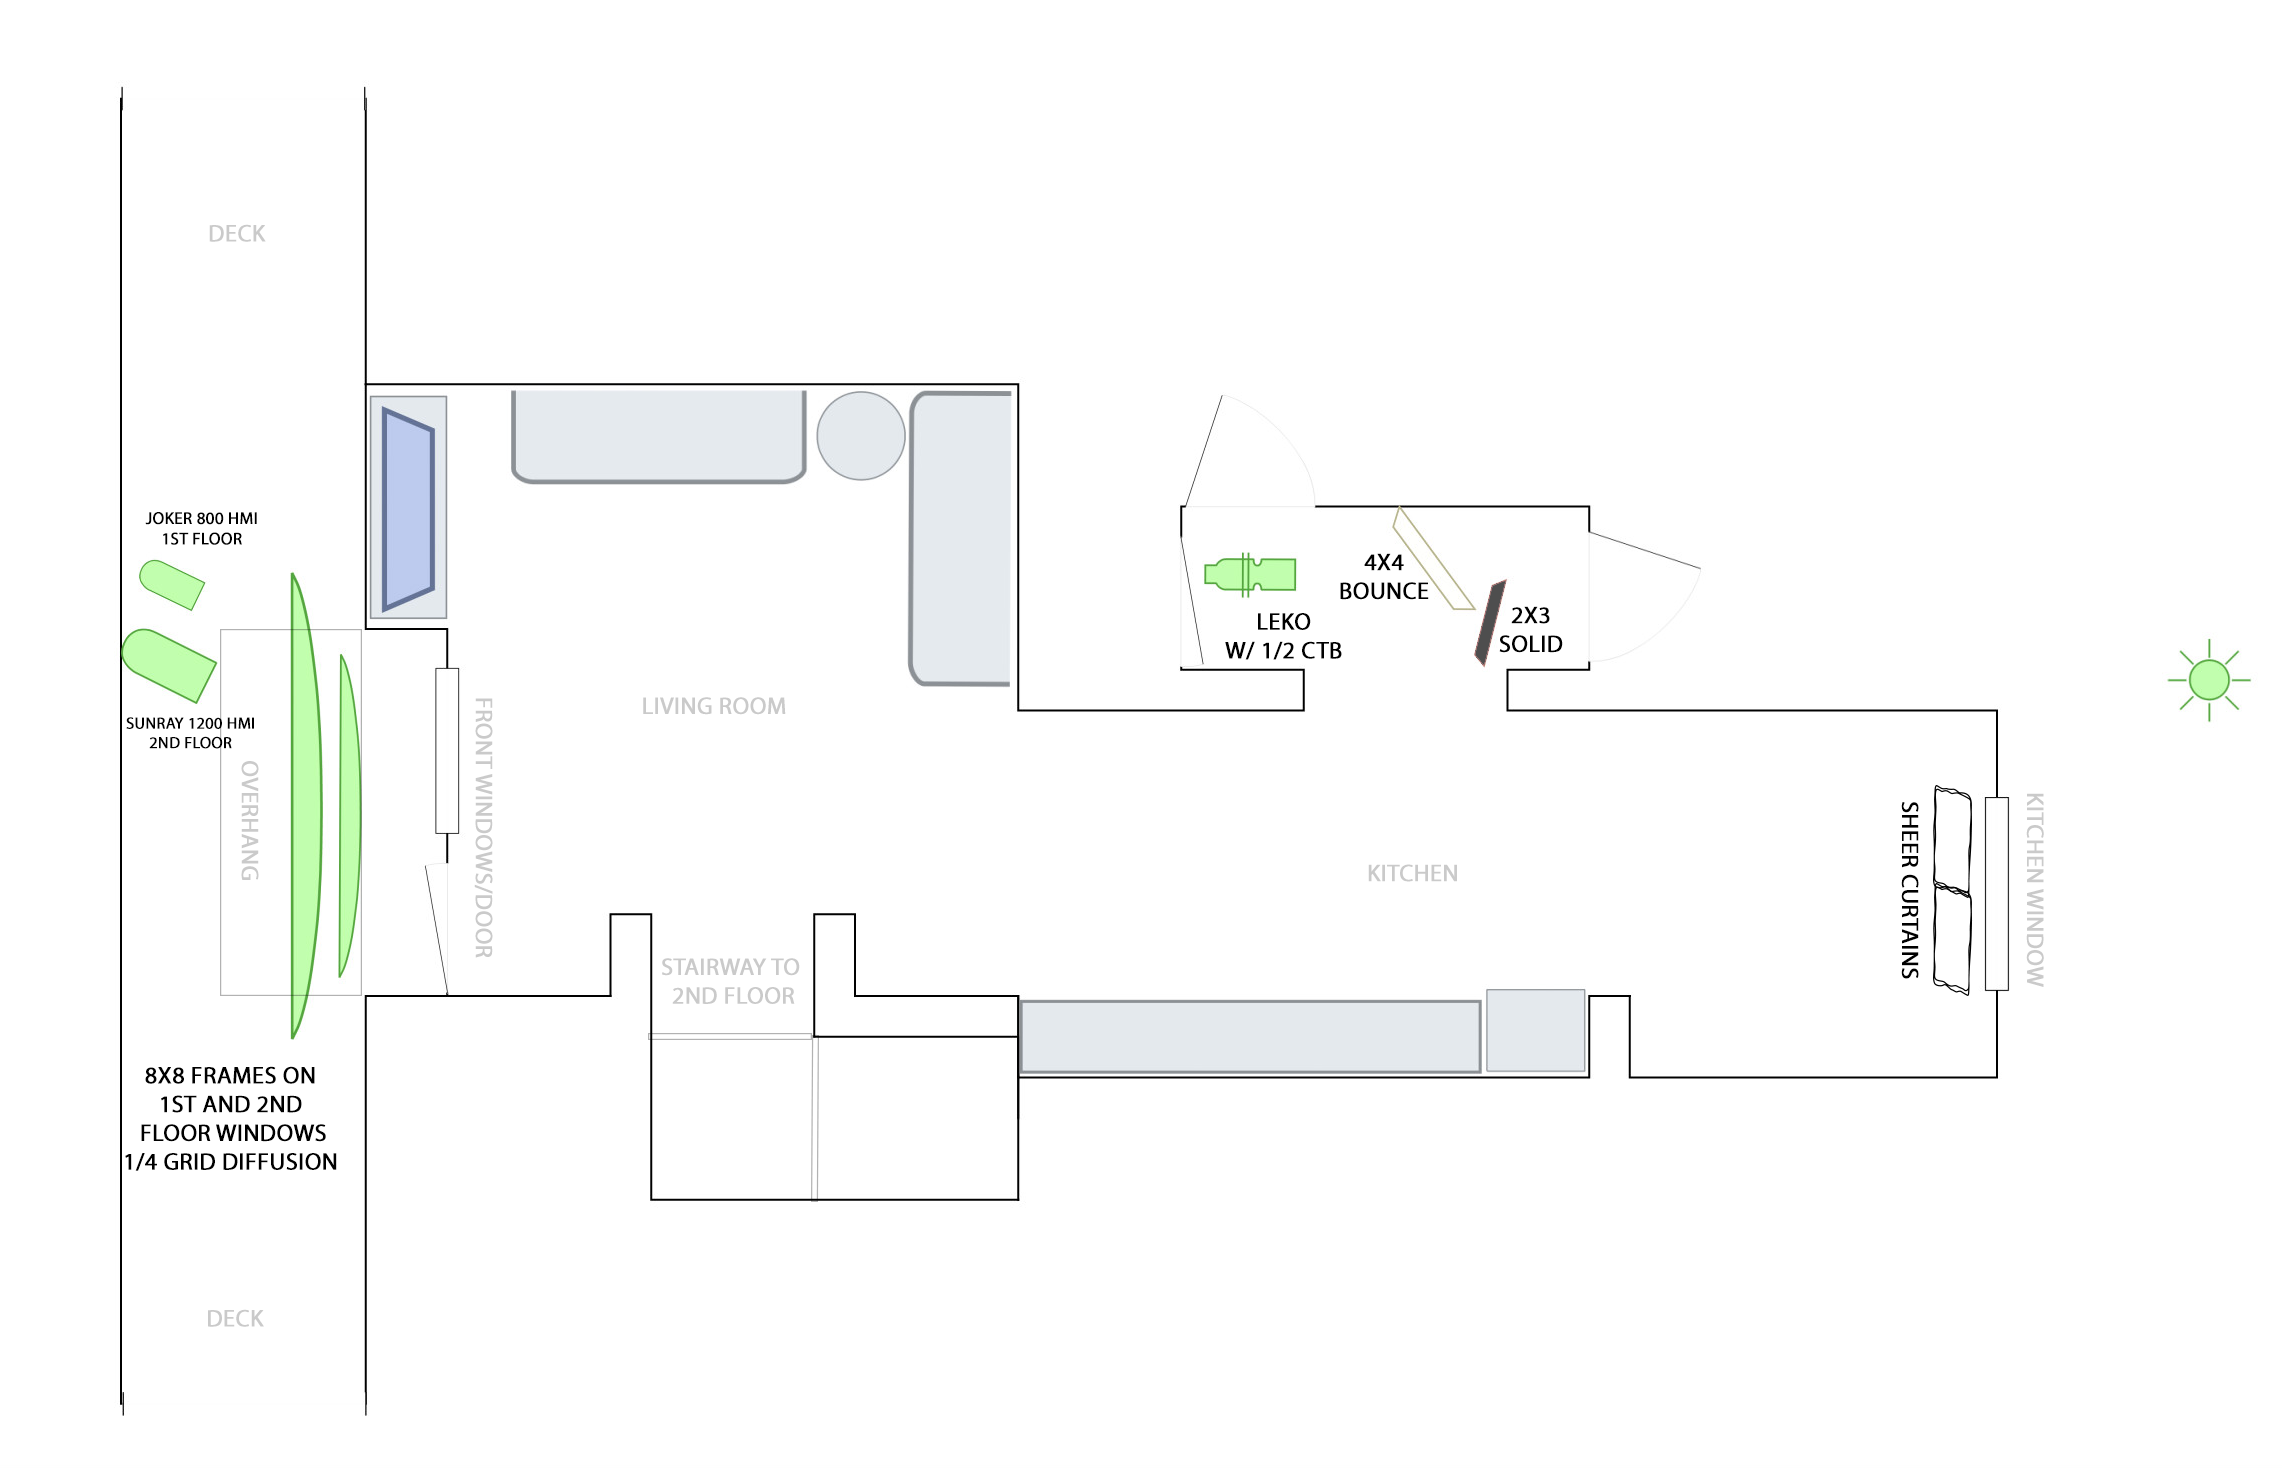
Lighting diagram devised by my gaffer and I.
First we setup two 8x frames with ¼ Grid Diffusion. These were rigged on stands and armed out to get them over and under a building overhang. This proved to be much faster and cost effective than frosting the windows with gel. Behind this we placed two HMIs to supplement the sunlight and give a little more push into the room. In the picture they are further off to the side than we actually had them.
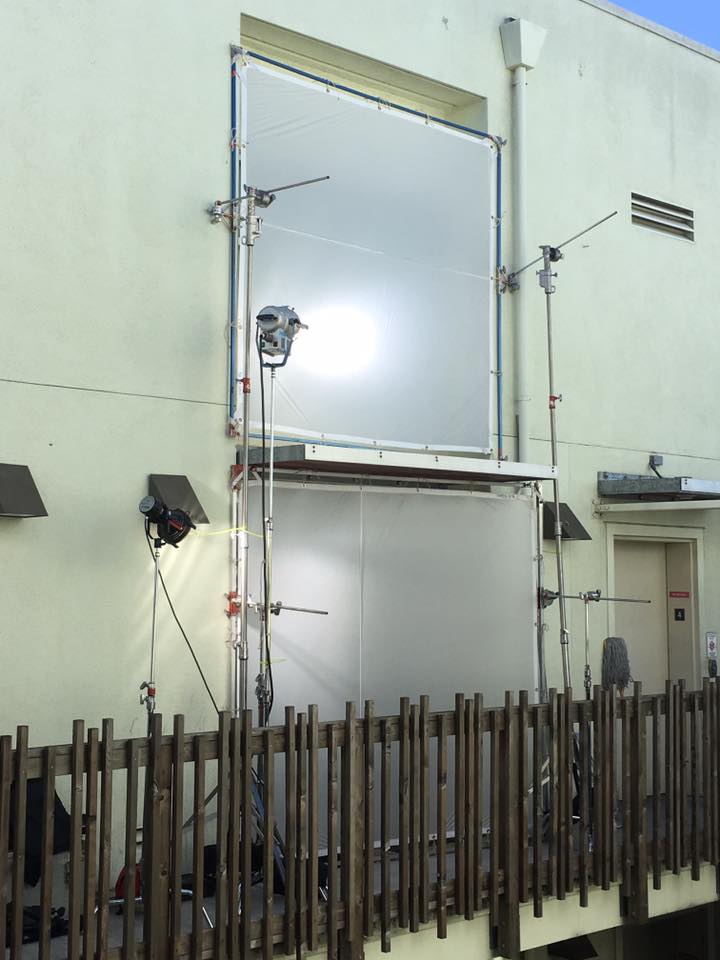
1st Floor: Joker 800 2nd Floor: Sunray 1200 2x 8×8 Frames with 1/4 Grid Diffusion
The vertical blinds could then be angled however we pleased to control and direct the nice soft light coming from this source. The 8x’s also allowed us to shoot directly towards those windows and provide the ‘heavenly’ ambience the scene called for.
The only other light we used was a 15 degree Leko gelled with w/ CTB. This was used to provide a bit of fill in the kitchen. It was fired into a 4×4 bead board positioned in the hallway leading off from the kitchen.
Towards the back of the kitchen was another fairly good-sized window. For a variety of reasons, lighting from outside was out of the question.
Again, we decided to frost this window to help tame the harsh morning sun and neutralize moving shadows. Once more we decided to use an alternative to gels and had art department install sheer curtains instead. They were much more cost effective and very fast to install.
A hazer was employed for the majority of the shoot to add some atmosphere and diffusion. It’s a favorite of mine for adding some quick mood to interiors.
This was our main setup for the majority of the shoot. We had a few 2×3 flags and some scrap Duvetyne that we used for negative fill in close ups. Occasionally we’d bring in a 4×4 bounce to wrap some of the light from the HMIs around our talent.
Once the lighting was set up, it was really a matter of placing the talent to best take advantage of the light and the geometry of the room. Very occasionally we’d pull our Leko and 4×4 bounce out of the hallway if we needed a little extra push from a particular direction, but for the most part everything was shaped by the blocking with a little aid from some negative fill or passive bounce. We could also dramatically change the look just by re-angling the blinds. This proved to be a very fast way to work!
Scheduling also played a big part in achieving our results, as that uncontrolled window in the kitchen was an issue. But careful work with the AD at the beginning of the shoot days alleviated that problem. We also made sure to schedule the shots that could take full advantage of our artificial light sources at the end of the day, to allow us continue shooting even after we had lost most of the natural sunlight.
By using this method of very simply supplementing and controlling the existing light at a location, as well as allowing ourselves to be flexible with the blocking and staging, we were able to make our day and achieve the dramatic visuals the director was looking for.
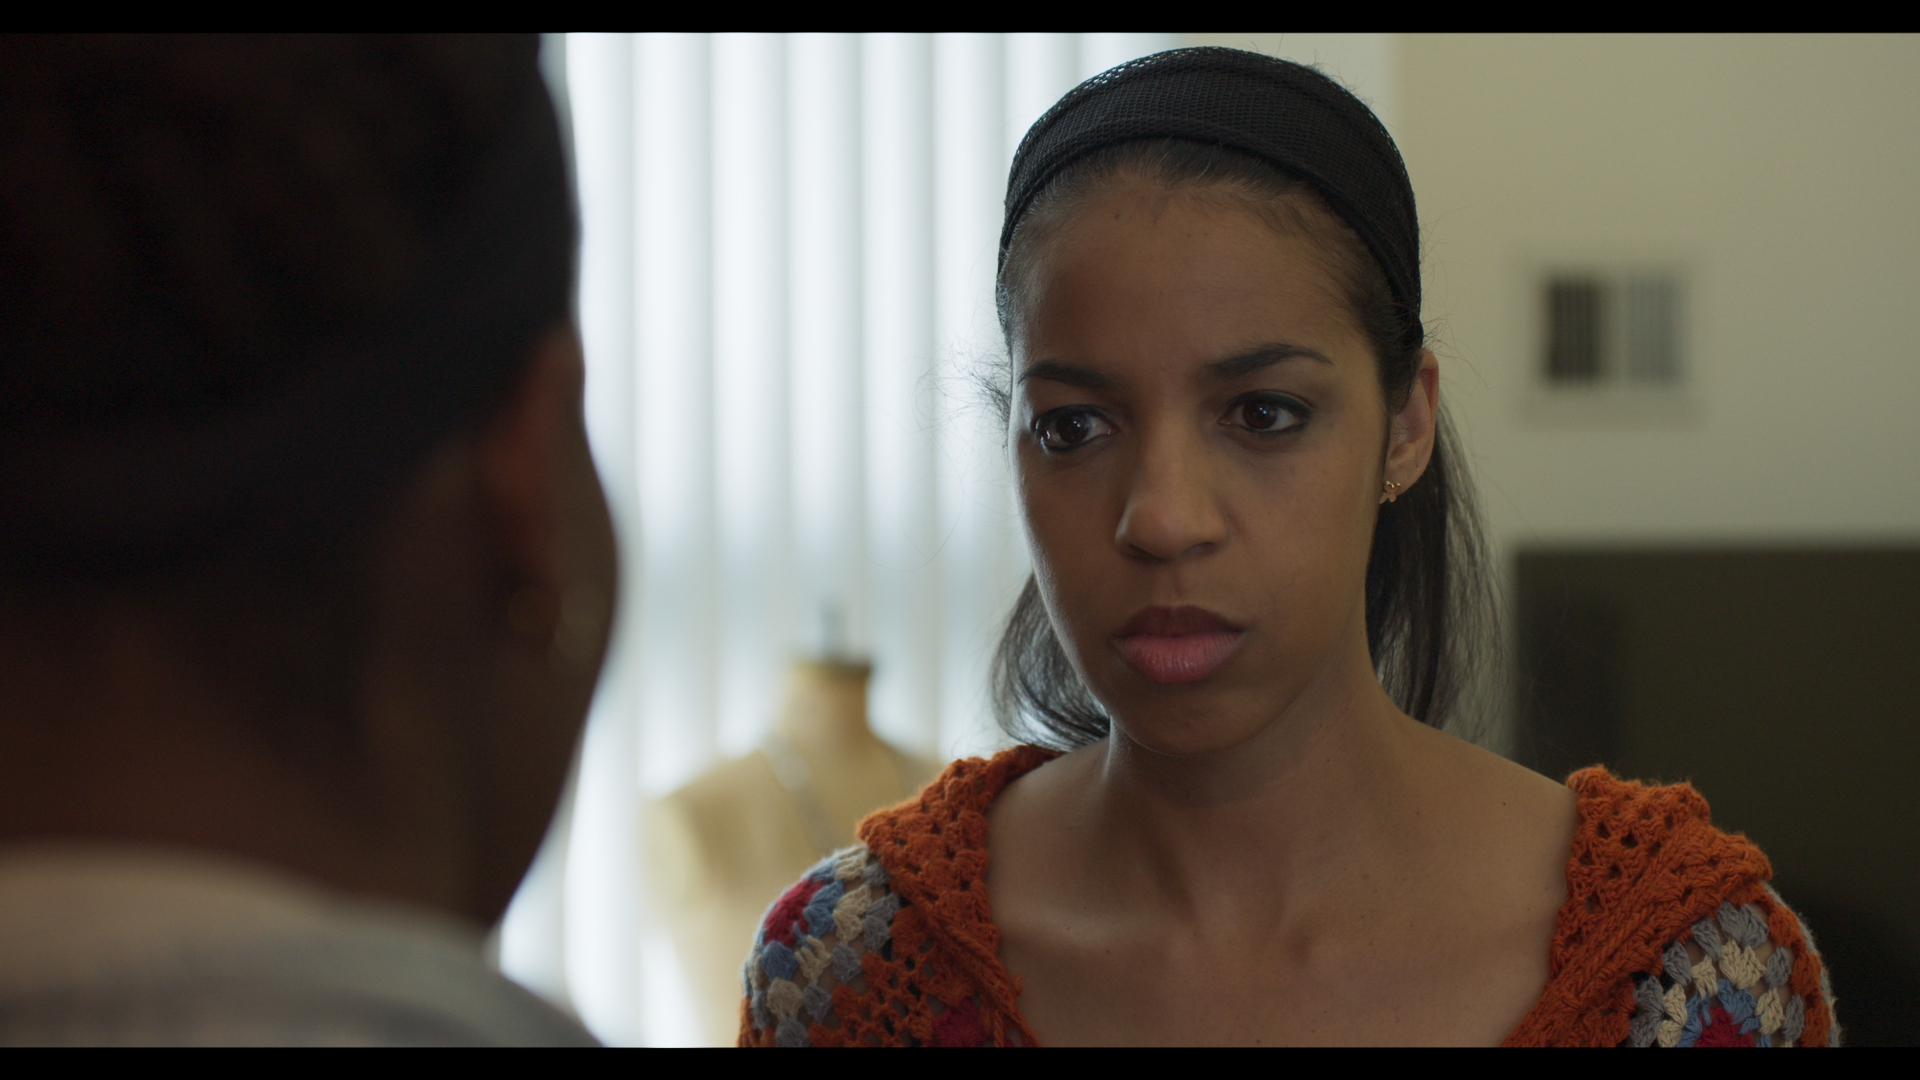
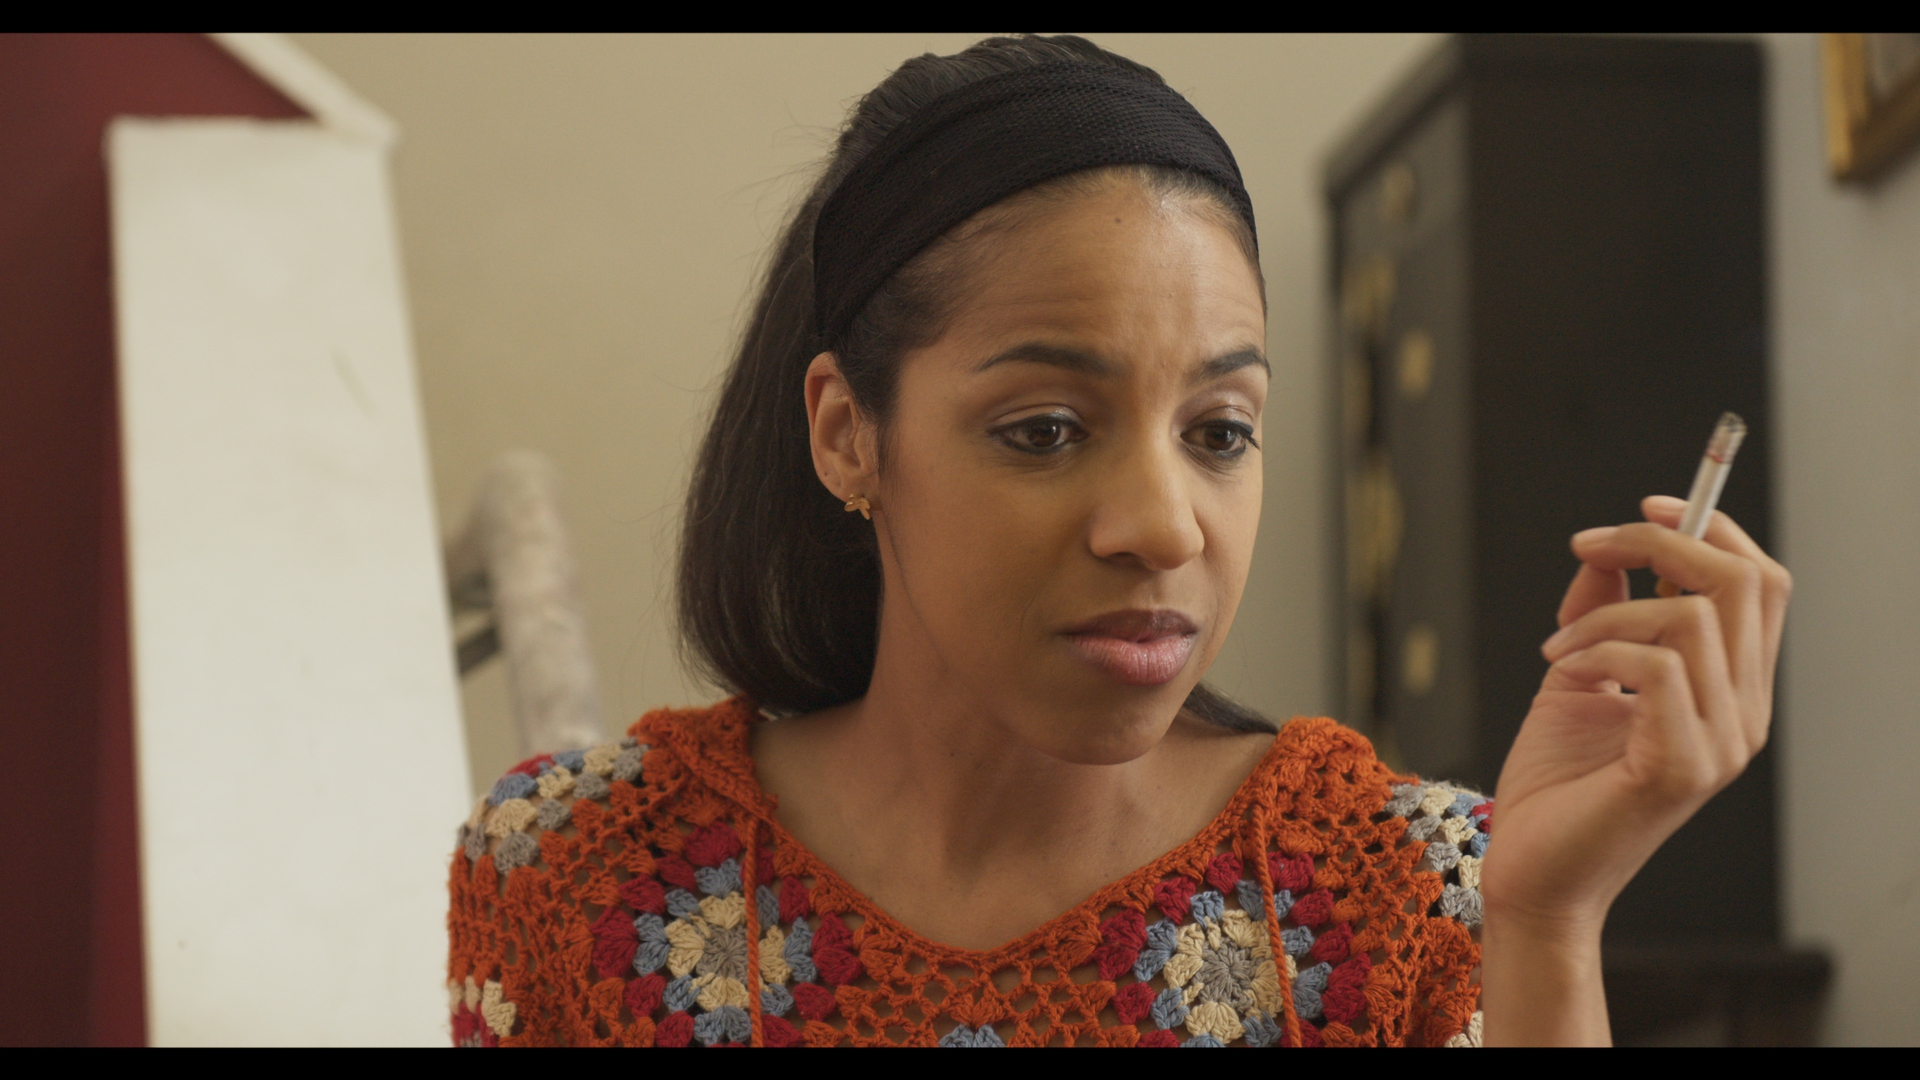
Example 1:
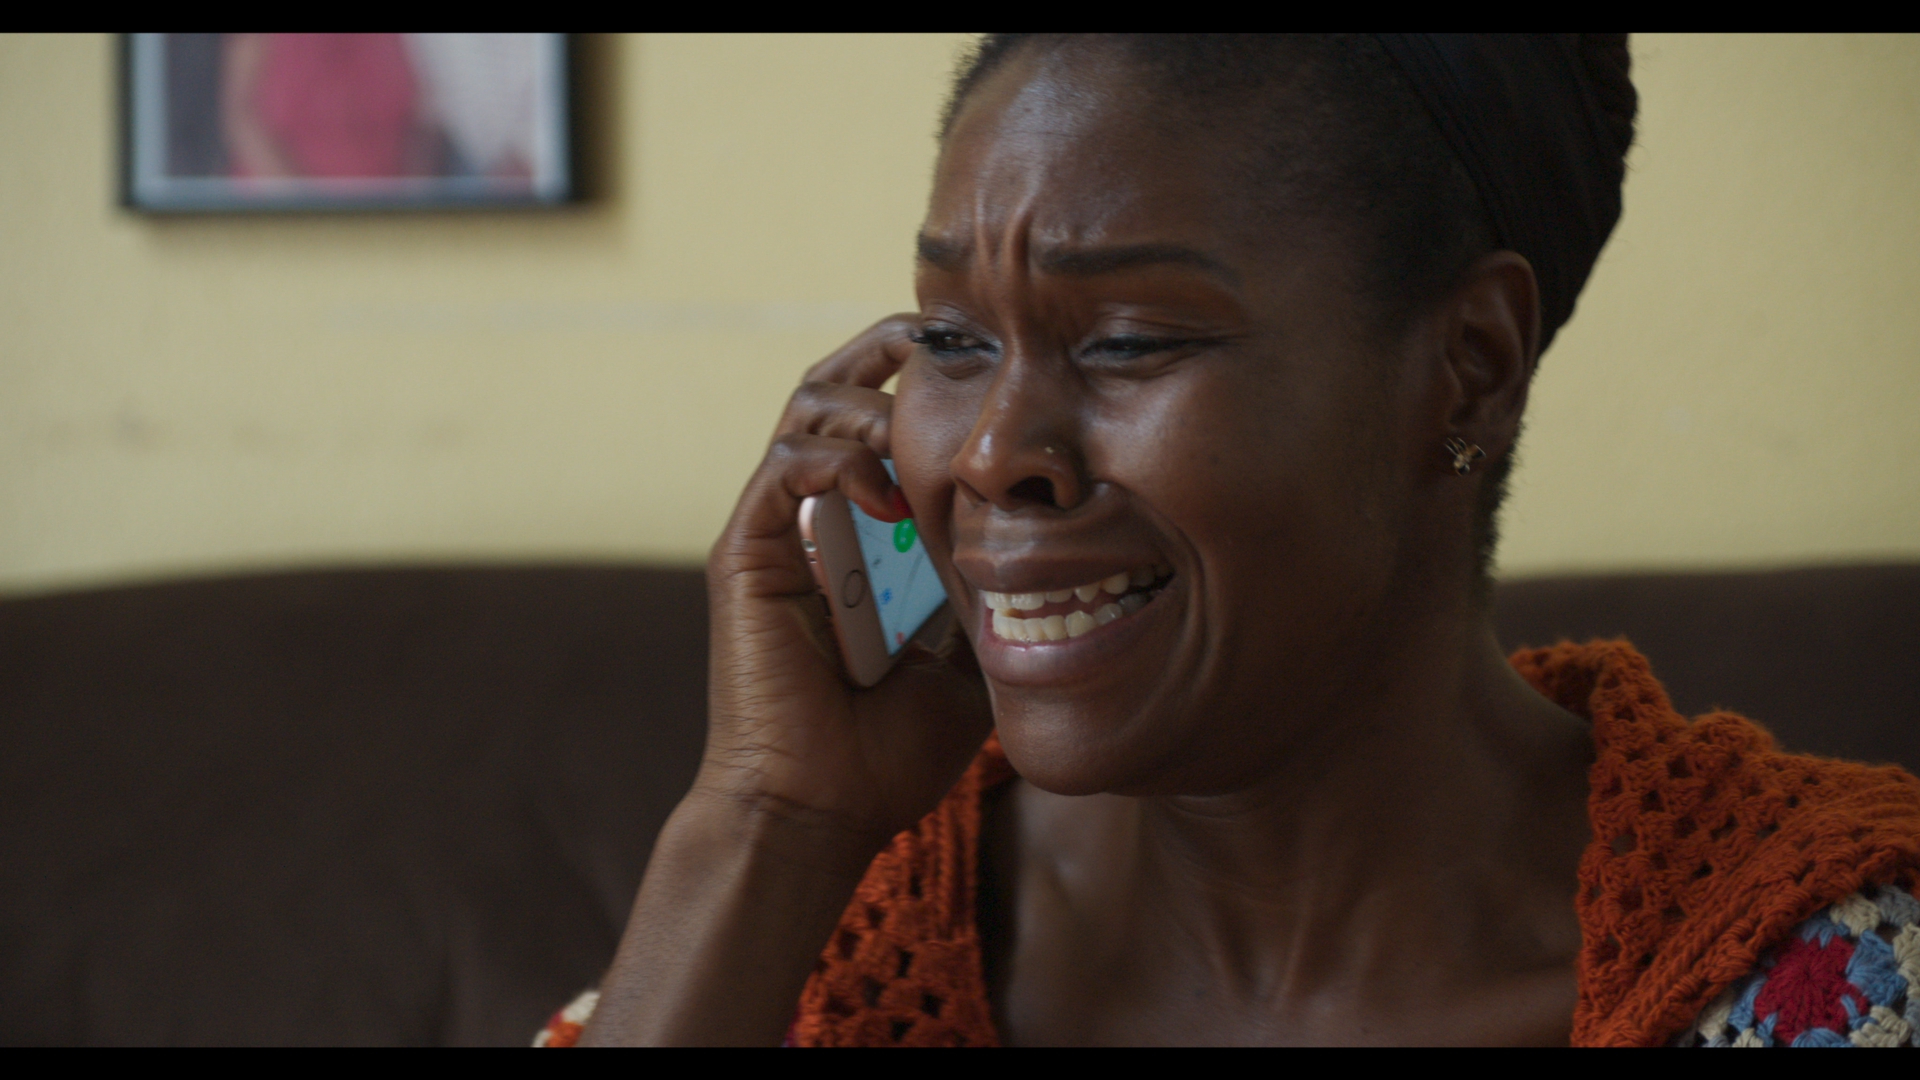
A little passive bounce provides provides a nice 3/4 key light. Negative fill on camera left, courtesy of a 2×3 flag, is hidden by the actress in the foreground. The backlight is provided by the HMI’s coming through the large living room windows. The blinds were angled for intensity and appearance.
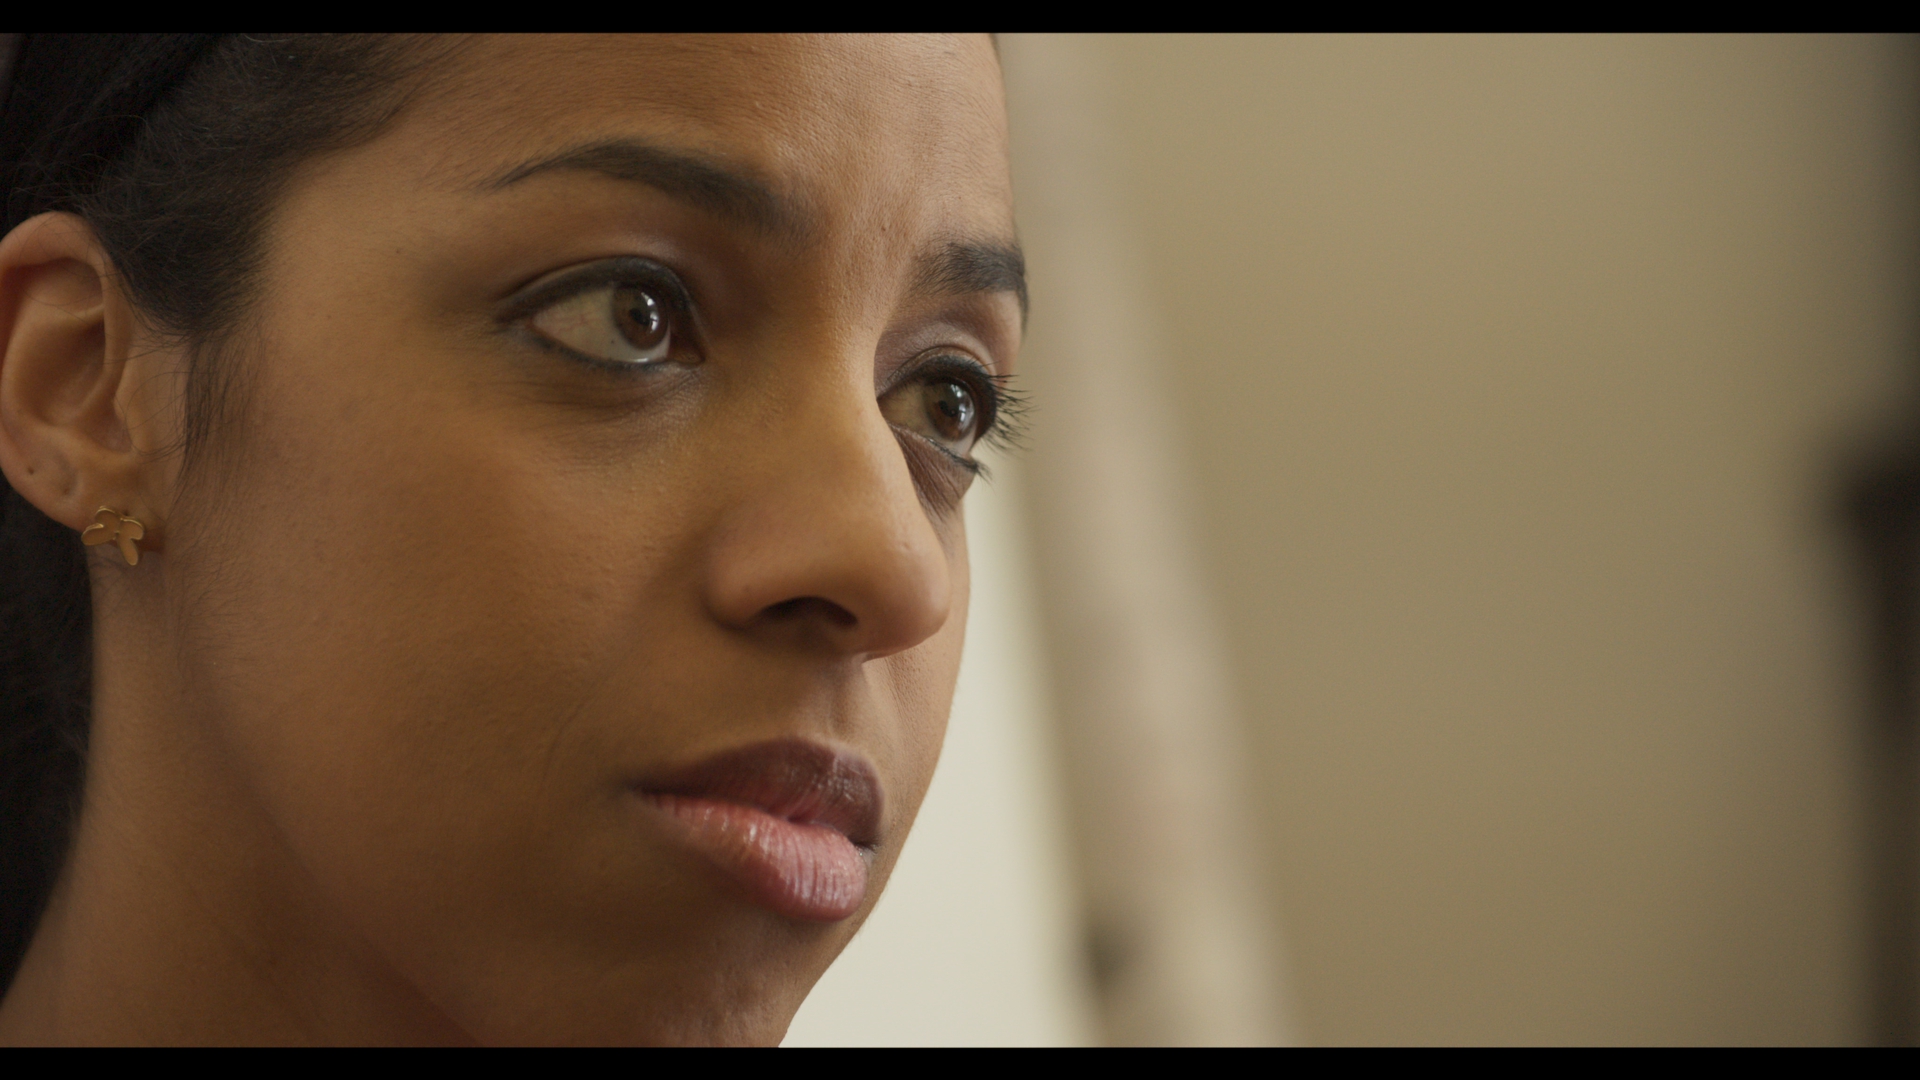
Example 2:
Here we just placed and faced our actress looking right into our nice soft front window setup. The background intensities were simply adjusted by varying the blinds between the upper and lower banks of windows. Contrast was provided by a scrap of 4×8 Duvetyne clipped to a c-stand and positioned behind and to the left of camera.
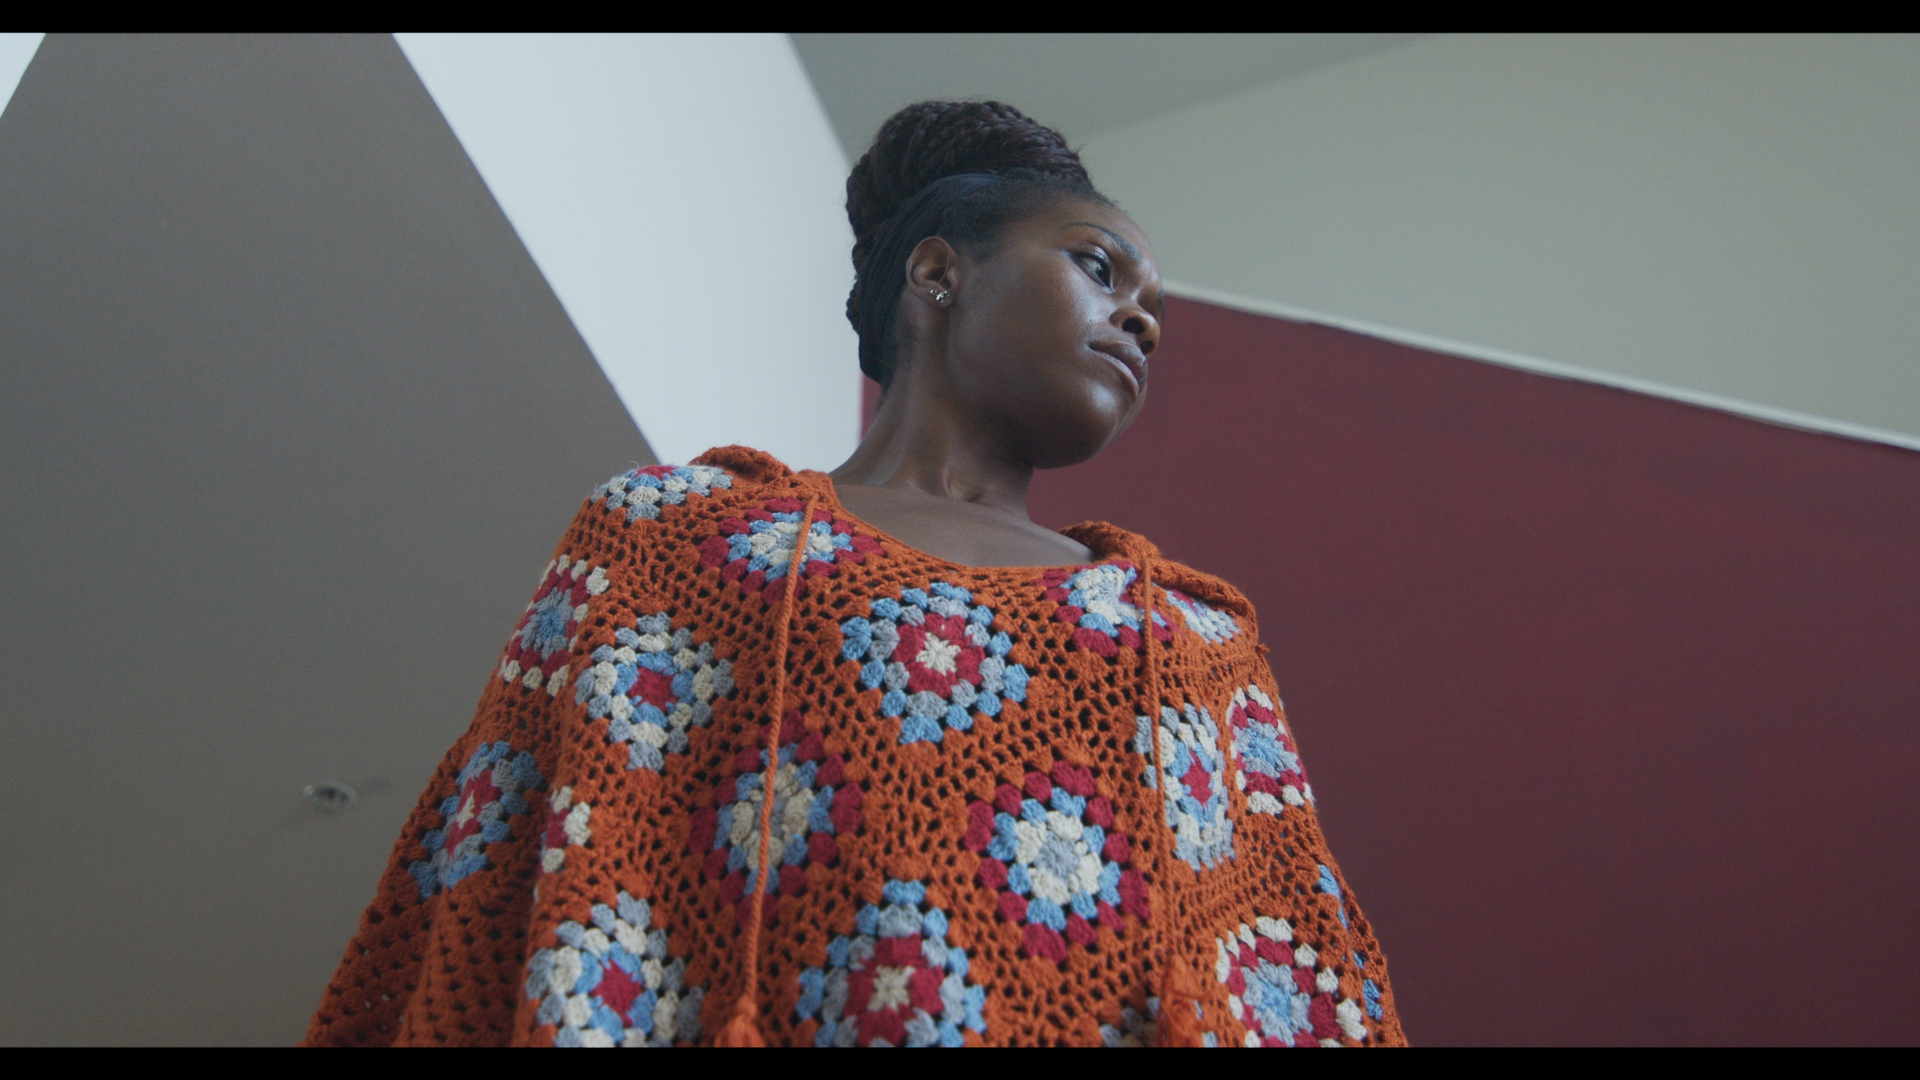
Example 3:
In this example the actress walks down the stairs towards the camera and faces the other actress off to camera right. Once again the key light is provided by positioning our actress to look towards our front window rig. The soft backlight coming in from camera left was provided by our 15* Leko bouncing into a 4×4 foam core. The Leko was dimmed and scrimmed quite heavily so that it was barely glowing. We would have just used passive bounce but we couldn’t get a good angle on it from kitchen.
A 2×3 flag near the wall off to camera right was rigged high up as a topper between the front windows and the staircase. This was angled to provided a nice gradient on the railing in the background.
Finally, our 4×8 Duvetyne rig was employed behind the camera to provide some contrast on the near side of her face. In hindsight, I would have liked to use a larger negative to increase the contrast even more. I’ll probably fix this in the color grade.
Notice how our two windows provide a perfectly natural eye light for our actress.

Bonus Example:
You can probably already guess what we did to accomplish that image I opened this article with. Here’s the diagram so you can see if you guessed correctly:
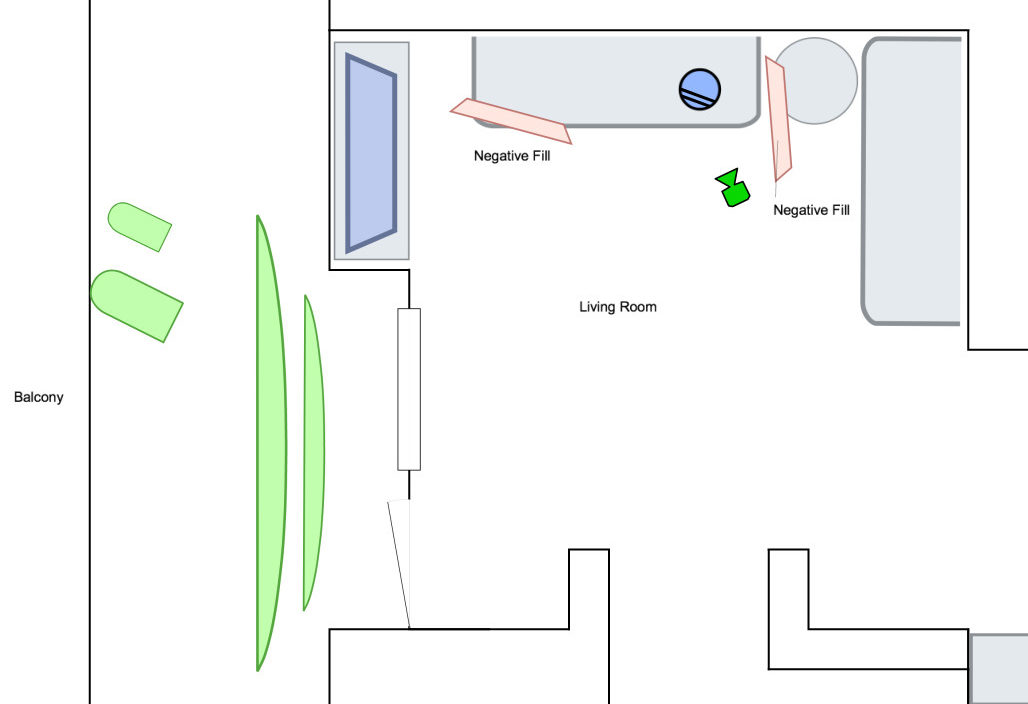
That’s right, just two 2×3 flags providing a bit of negative. So simple.
Special thanks to Bolaji Qudus and Ren Long for the use of these images! More information on this project coming soon!